Smart Setup
Bevy Design's Smart Setup is here to help you set up your campaign in a quick and easy manner. Just by following a few simple steps, you can set up the perfect campaign for your website or Shopify store.
Step 1: On the Bevy Design Dashboard, click on Create A Campaign to enter Smart Setup.

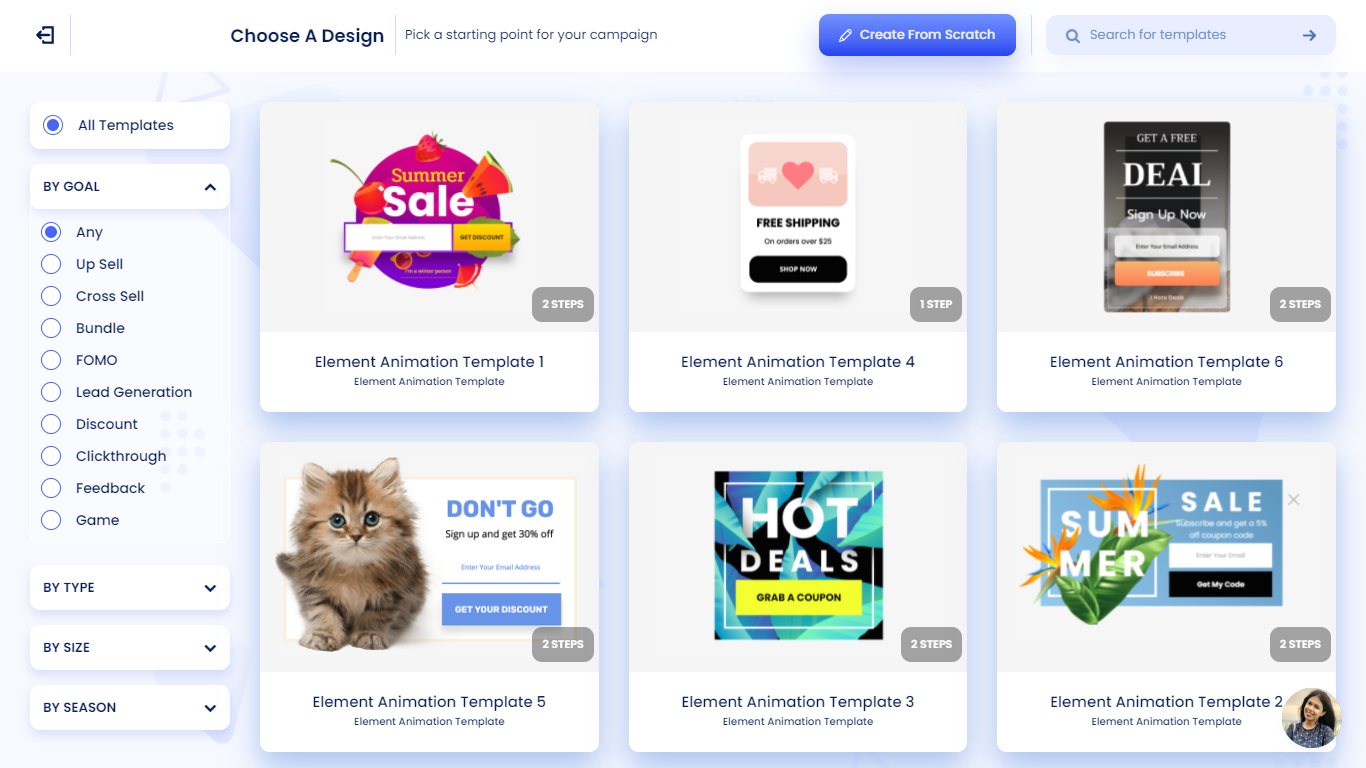
Step 2: Next, select a campaign template that catches your eye to get started. You'll find filters that help you narrow down the choices based on goal, type, size or season.

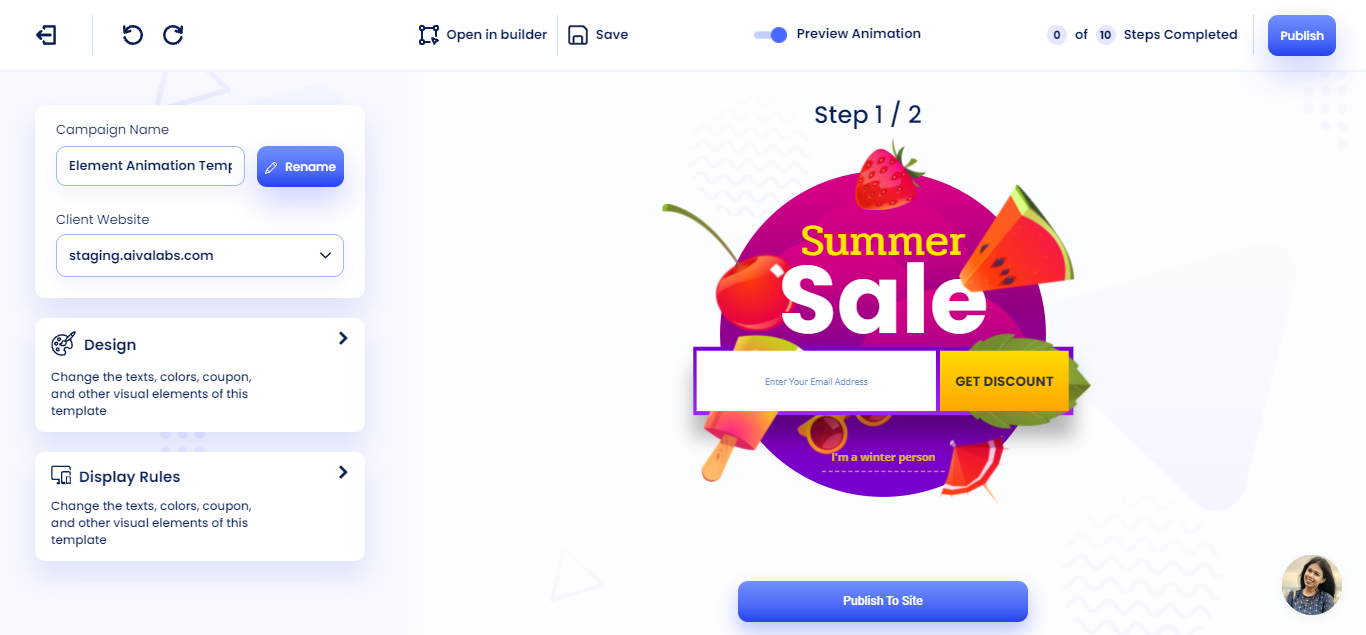
Step 3: You have entered the Smart Setup. First, you will see options to set a name for your Campaign and choose what site to publish your campaign on.
The user will be rewarded with 250 free pageviews when entering the smart setup for the first time.
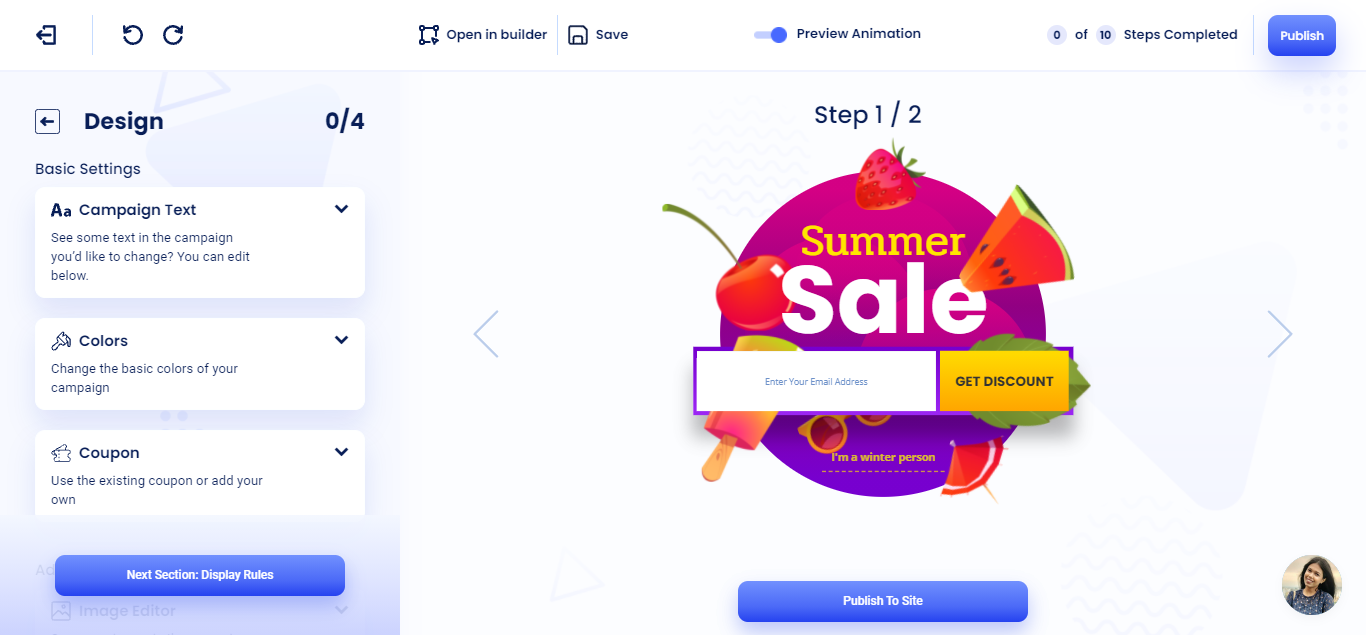
Step 4: On the right side, there will be two more options. The first is the Design option, where you can change text and design elements of your campaign.

Under Basic Settings, you will find up to 3 options depending on your template.
- Campaign Text: Here, you’ll be able to change any of the texts in the campaign to your liking.
- Colors: You can change the colors of different elements in your campaign to align the look of the template to your brand colors, or any color which suits your campaign.
- Coupon: In this section, you can add or change coupon settings, including setting options for click to copy and automatic coupon application.
Under Advanced settings, you will find one other option:
- Image Editor: This feature allows you to upload your own images or edit the images that are already provided with the template.
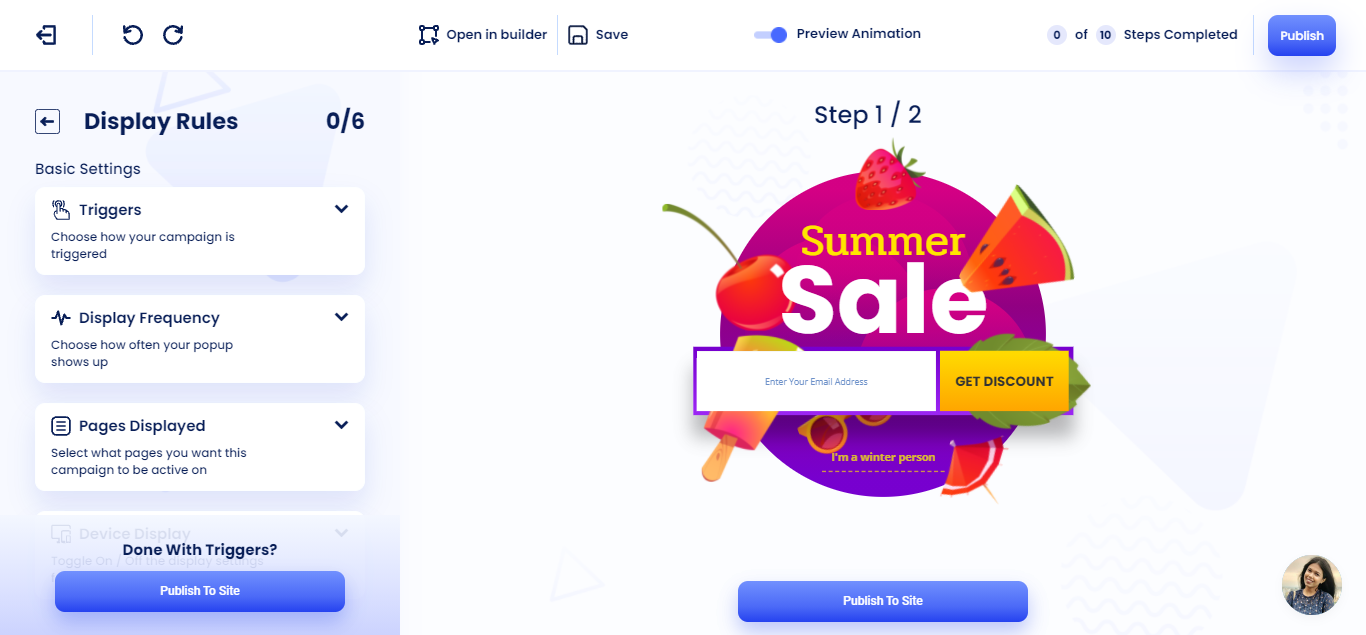
Step 5: The second option is the Display Rules option, where you can set how the campaign is displayed on your website.
The user will be rewarded with 20 free pageviews when entering the display rules tab for the first time.
Under Basic Settings, you will find up to 5 options:
- Products Displayed: You can choose what products you want to display in the campaign.
- Triggers: You can choose how your campaign will be triggered. This includes time based, scroll based, and exit intent options.
- Display Frequency: This chooses how often your campaign will be displayed to users, and to what type of user this would be displayed to.
- Pages Displayed: Here, you can set on which pages of your website the campaign will be displayed in. You can choose to display on all pages or on specific pages using keywords.
- Device Display: With this option, you can choose if you want to display your campaign on Desktop only, Mobile only, or both.
Under Advanced Settings, you will find up to 4 options:
- Cart Value Targeting: Using this option, you can target customers based on the value of their cart.
- Product Page Targeting: Here, you can target customers based on the product page they are viewing currently.
- Position on Page: Here, you can set the position where your campaign would appear on page, for both Mobile and Desktop.
- Scheduling: Using this option, you can choose when and for how long your campaign would be displayed.
Step 6: If you’re happy with your campaign, you can click the Publish To Site button to start displaying your campaign on your website or Shopify store.
Want to customize your campaign further? Try out the Bevy Builder for even more options!
